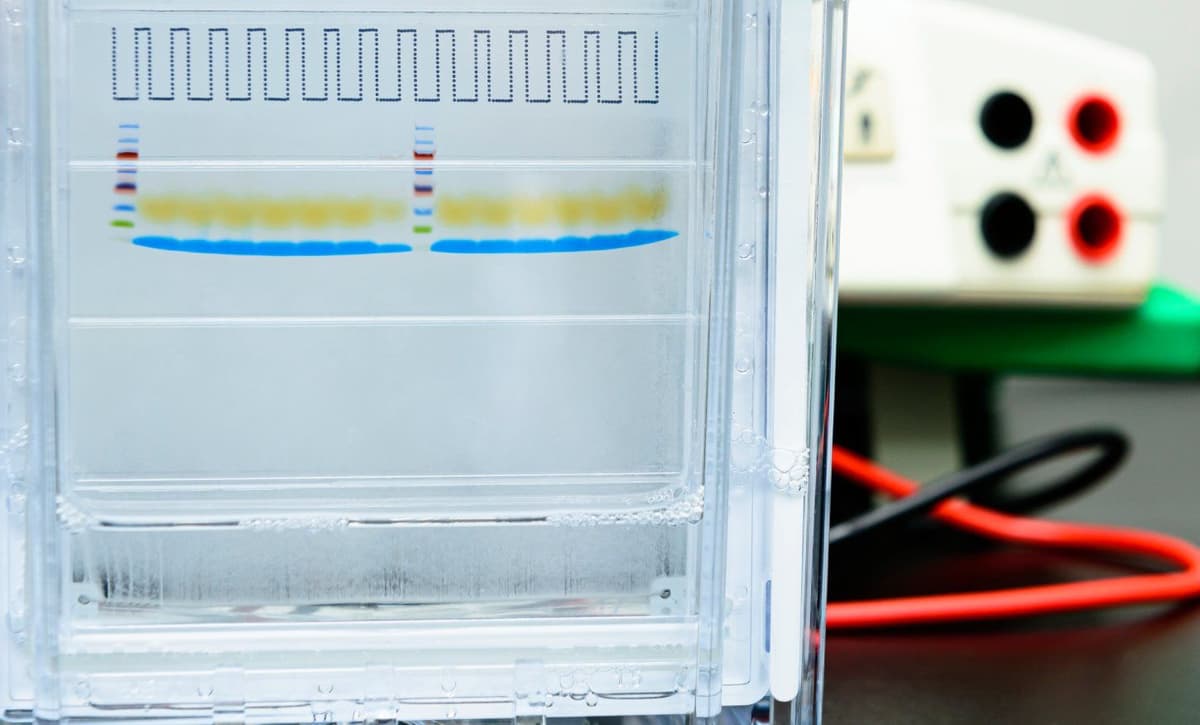
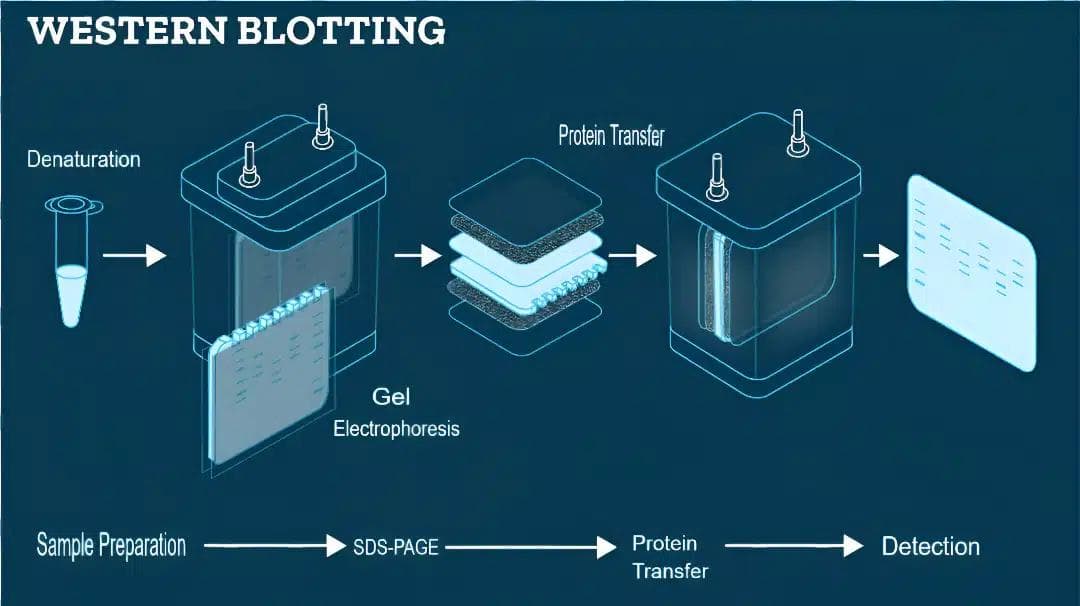
SDS-PAGE (Sodium Dodecyl Sulfate-Polyacrylamide Gel Electrophoresis) and Western blotting are complementary techniques used to analyze proteins. While SDS-PAGE is a fundamental technique for separating proteins by molecular weight, western blotting allows for the transfer of these proteins onto a membrane, enabling specific identification. Together, these techniques provide a powerful approach for studying protein expression, structure, and function.
However, issues such as poor protein transfer, weak signals, or high background noise can compromise data quality, hindering the reliability and reproducibility of results. Using high-quality reagents, such as those supplied by Boston BioProducts, alongside an optimized protocol can minimize the risk of these common challenges.
Our SDS-PAGE and Western blot protocol offers detailed, step-by-step instructions, troubleshooting tips, and our best practices to help you obtain reliable, high-quality data.
Here's everything you need to carry out our SDS-PAGE and western blot protocol. In addition to Boston BioProducts' high-quality buffers and reagents, you'll need the following materials and equipment:
This SDS-PAGE and western blotting protocol will guide you through the key steps from sample preparation to detection, to help ensure clear and reproducible data and western blotting success!

Proper sample preparation is critical for obtaining reliable and reproducible Western blot results. This step ensures that proteins are extracted efficiently, remain intact, and are accurately quantified before SDS-PAGE. Below, we outline the key steps to prepare your samples for analysis.
SDS-PAGE is a widely used technique to separate proteins based on molecular weight. The process involves denaturing proteins with SDS, which imparts a uniform negative charge, allowing proteins to migrate through a polyacrylamide gel under an electric field. The following steps guide you through gel preparation, sample loading, and electrophoresis conditions to achieve optimal protein separation.
Following electrophoresis, proteins must be transferred from the gel onto a membrane for detection. This transfer step is crucial to ensure that target proteins are accessible for antibody binding. There are two primary transfer methods: wet transfer, which is ideal for larger proteins, and semi-dry transfer, which is faster and suited for smaller proteins. Below, we outline the steps for each method and tips to ensure efficient protein transfer.
Blocking and antibody incubation are key steps in Western blotting, ensuring specific binding of antibodies to the target protein while minimizing background noise. The choice of blocking buffer, antibody concentration, and incubation times can significantly impact the clarity and specificity of your results. Follow the steps below to optimize your antibody binding for high-quality detection.
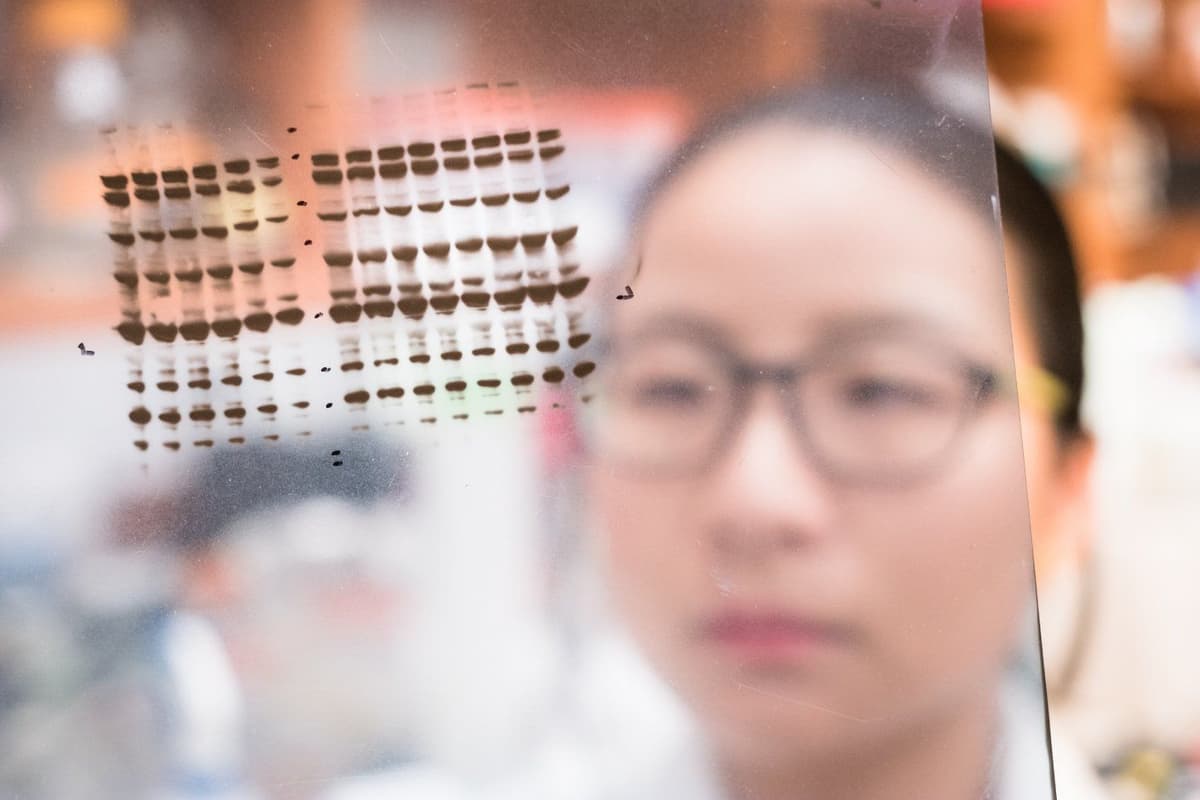
Once antibodies have bound to their target proteins, detection methods such as chemiluminescence, fluorescence, or colorimetric assays are used to visualize protein expression. Proper imaging and quantification help ensure that results are reproducible and provide meaningful biological insights. Below, we outline the key steps for detecting and analyzing your protein bands.

Even the most well-planned experiments can encounter unexpected challenges. Common issues such as poor protein transfer, weak signals, and high background noise can significantly impact data quality and reproducibility.
Using high-quality buffers and reagents, combined with a well-optimized protocol, can minimize the risk of these common challenges. Below are some common issues encountered during the SDS page and western blot protocol, alongside some key strategies to help you troubleshoot and optimize your results.
The problem:
This could be a result of the proteins degrading, potentially caused by issues with sample preparation and handling.
What to do:
The problem:
Curved or distorted bands ('smiling bands') may indicate uneven migration during electrophoresis.
What to do:
The problem:
If proteins do not transfer fully from the gel to the membrane, your target bands might be faint or missing entirely.
What to do:
The problem:
Excessive background noise, which can be caused by issues with blocking buffer, antibody concentrations, or washing, can make bands hard to see
What to do:
The problem:
A weak or absent signal may be due to several factors, such as insufficient antibody binding or problems with the transfer process.
What to do:
Reagent | Product Name | CAT# |
|---|---|---|
Lysis buffer | RIPA buffer NP-40 lysis buffer Triton X-100 Lysis Buffer CHAPS Lysis Buffer | |
Laemmli buffer | Laemmli SDS-Sample Buffer (6X, Non-Reducing) Laemmli SDS-Sample Buffer (6X, Reducing) Laemmli SDS-Sample Buffer (4X, Non-Reducing) Laemmli SDS-Sample Buffer (4X, Reducing) | |
SDS solution | Sodium Deoxycholate Solution (10%) Sodium Dodecyl Sulfate, SDS (20%) Sodium Dodecyl Sulfate, SDS (10%) | |
Acrylamide Solution | Acrylamide (30%) Acrylamide (40%) Bis-Acrylamide BioAcryl-P (30%, 29:1) BioAcryl-P (40%, 29:1) BioAcryl-P (30%, 37.5:1) BioAcryl-P (40%, 37.5:1) BioAcryl-P (30%, 39:1) BioAcryl-P (40%, 39:1) | |
Stacking buffer | Stacking buffer | |
Separating buffer | Separating (Resolving) Buffer | |
Deionized water | Reverse Osmosis Deionized Water | |
Running buffer | Tris-Glycine-Native Running Buffer (10X) Tris-Glycine-SDS Running Buffer (10X) MOPS-SDS Running Buffer (20X) MES-SDS Buffer (20X) | |
Transfer buffer | Transfer Buffer (10X, Electro Blotting) Semi-Dry Blot Transfer Buffer (10X) Bis-Tris Transfer Buffer (20X) | |
Ponceau | Ponceau S Solution | |
Blocking buffer | Non-Fat Powdered Milk (Blotto) Bovine Serum Albumin, BSA (5%, TBST) Bovine Serum Albumin, BSA (5%, TBS) Bovine Serum Albumin, BSA (3%, PBS) Bovine Serum Albumin, BSA (3%, TBS) Bovine Serum Albumin, BSA (3%, TBST) Bovine Serum Albumin, BSA (3% in PBST) Casein (3%, PBS) Casein (3%, TBS) Gelatin (10%) | |
Wash buffer | Tris Buffered Saline, TBS (10X, for Western Blot Washing) Tris Buffered Saline, TBS (20X, for Western Blot Washing, pH 7.4) Phosphate Buffered Saline (10X, for Western Blot Washing) | |
Stripping buffer | Stripping Buffer (4X, Mild) Stripping Buffer (4X, Medium) Stripping Buffer (4X, Strong) |
Consistent buffer composition, ultrapure chemicals, and carefully formulated blocking agents can improve protein separation, enhance target detection, and reduce non-specific binding. Whether it's selecting the right lysis buffer for efficient protein extraction, using high-purity SDS sample buffers for proper denaturation, or employing optimized detection reagents for clear, high-sensitivity results, each component plays a crucial role in data quality.
By integrating Boston BioProducts' high-quality reagents into your SDS-PAGE and Western blotting protocol, you can achieve clearer, more consistent results, increasing the reliability and reproducibility of your protein analysis, and reducing troubleshooting time.

Collect and label your samples carefully, and dilute them as necessary.
Choose a lysis buffer based on your sample type and desired downstream applications (check out our recommendations). Add it to your samples to lyse them.
Centrifuge your samples to remove insoluble debris (we use 14,000 x g for 15 minutes for cell samples).
Then, transfer the supernatant to a clean microcentrifuge tube and discard the pellet.
Measure the protein concentration of your lysate using an appropriate assay, such as Bradford or BCA, to ensure equal loading across samples.
Prepare your protein samples for SDS-PAGE by taking the recommended protein amount (10-50μg/lane) and diluting it in a sample buffer such as Laemmli. Heat the samples at 95°C for 5 minutes to fully denature the proteins.
Prepare the resolving and stacking gels. The table below provides a basic recipe to make 1 gel (10% acrylamide). Make sure you optimize it based on the size of your protein of interest.
Once the gel is set, gently remove the comb. It's time to load equally across wells. Include a molecular weight ladder in one of the lanes.
Run the gel at a constant voltage (100-200v) until the desired separation is achieved.
Once SDS-PAGE is complete, carefully pry open the apparatus with a gel knife and remove the gel.
Choose your membrane type:
Soak the membrane in transfer buffer for 10 minutes to help equilibrate the gel.
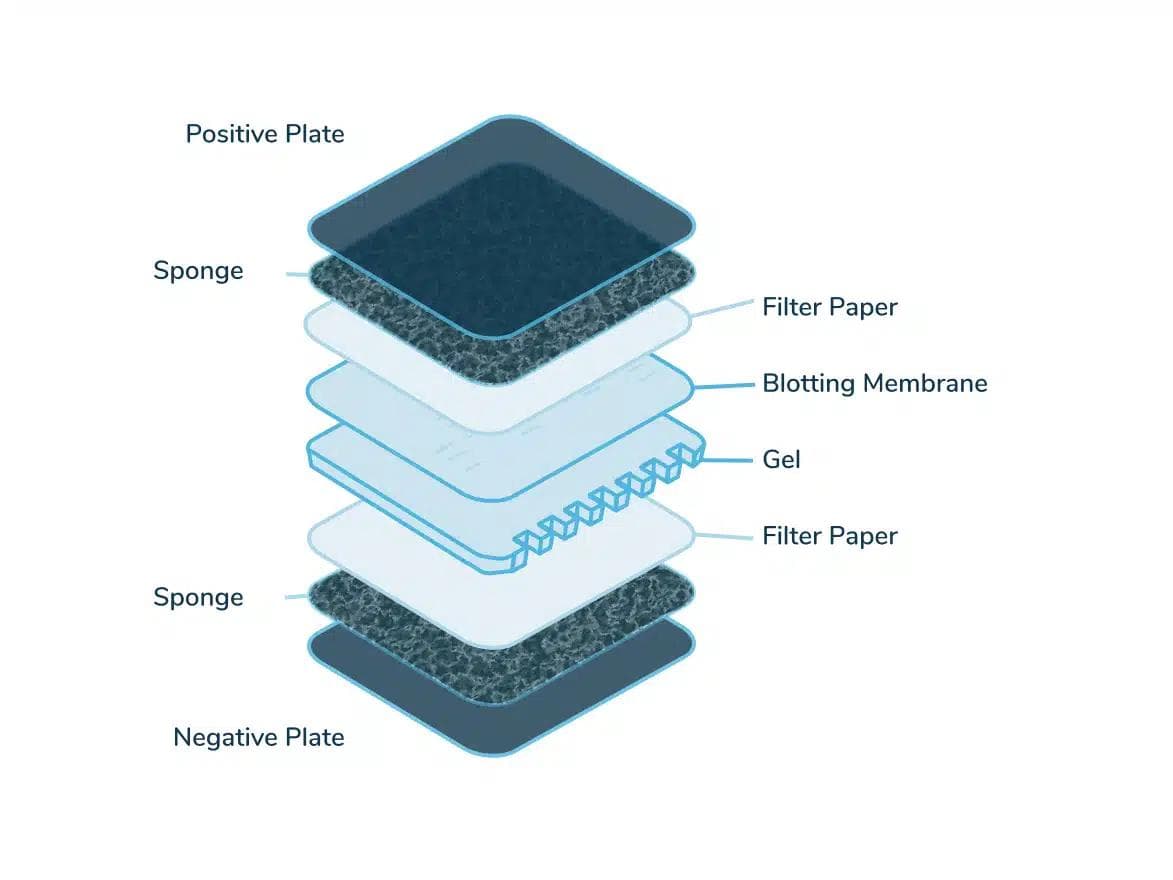
Prepare the transfer sandwich in the transfer cassette according to the illustration below.

Perform either a semi-dry or wet transfer.
Semi-Dry Transfer:
Wet Transfer:
(Optional) Confirm the success of the protein transfer using Ponceau.
Incubate the membrane in a blocking buffer for either one hour at room temperature, or overnight at 4°C with gentle rocking.
Dilute the primary antibody to working concentration with blocking buffer and incubate the membrane in the solution (either with gentle rocking overnight at 4 °C, or 1 hour at room temperature).
Wash the membrane with wash buffer (either TBS, TBST, or PBS) for 10 minutes, three times.
Incubate the membrane with the diluted secondary antibody for one hour at room temperature.
Wash the membrane again (for 10 minutes, three times) to remove any unbound antibody.
If using or chemiluminescent detection method, prepare the chemiluminescent substrate solution according to the manufacturer's instructions and incubate the blot in the substrate solution for 1-5 minutes.
Place the blot in the imaging system tray or scanner.
Image your blot, adjusting exposure as needed.
Remove the membranes from the scan bed, and clean the image scanning bed.
To quantify, utilize image analysis software that supports band detection and quantification.
Remember to keep your samples on ice to prevent degradation!
Remember to add protease inhibitors.
Choose the appropriate lysis buffer: NP-40 for whole cell lysate; RIPA membrane-bound, nuclear, or mitochondrial proteins; Tris-HCL for cytoplasmic proteins.
Use BCA assay if working with samples that contain <5% detergent for higher sensitivity.
Larger proteins should have a lower percentage of acrylamide in the gel.
Remember to create the wells in your gel by carefully inserting a comb while the stacking gel is still wet.
Only add the APS and TEMED when you are ready for the gel to set!
Be careful not to touch the bottom of the wells with your pipette tip, as this can create distorted bands.
It helps to load your samples asymmetrically to help orient the gel during transfer.
Running times and voltages should be optimized, e.g., larger proteins will require a higher voltage for a longer period of time.
Use an ice pack or perform the transfer in a cold room to prevent overheating.
For a fluorescent western blot, Ponceau staining is not recommended as it can cause high background fluorescence, even after washing.
If you are using PVDF, you must first soak the membrane in methanol for 30 seconds.
Make sure you gently remove air bubbles with a small roller or pipette.
Make sure you put the gel closest to the negative electrode and the membrane closest to the positive electrode.
Choose semi-dry transfer for a faster, easier transfer of small-volume or small-sized (<30kDa) proteins. Opt for wet transfer if you want to transfer a larger (>100kDa) target protein.
The blocking buffer can be either BSA, milk powder, casein, or Gelatin. For guidance on which to choose, see our FAQs.
Remove any excess substrate by dabbing the edge of the blot with tissue paper.
Component | Separating gel (10%) | Stacking gel (4%) |
|---|---|---|
1.25mL | 0.25mL | |
Separating buffer (4X) | 1.25mL | - |
Stacking buffer (4X) | - | 0.625mL |
2.5mL | 1.625mL | |
10% APS | 50μL | 25μL |
TEMED | 5μL | 2.5μL |
Total (mL) | 5mL | 2.5mL |